
In this installment of “Advanced Filtering Tips” I am going to combine several filtering elements and take advantage of an often overlooked attribute of the advanced filter.
The more the merrier!
I’ve shown you filtering of notes and of text, each by themselves. You can also combine elements when using the advanced filter, and get more bang for your buck.
Here I’m constructed a pretty silly example but it will be effective at getting the point across.
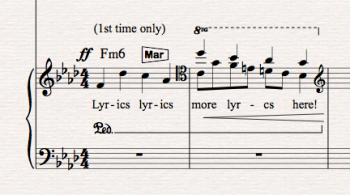
Let’s assume we want to end up with just the notes in voice 1 with lyrics attached when we’re done.
Time to make a list of what we want to get rid of.
Notes: Just those 8th notes in voice 2 in the 2nd bar
Text: 1st time only (technique text), the fortisimo marking (expression text) and a chord symbol
Lines: The pedal marking, the crescendo and the 8va line
Clefs: The tenor clef and the treble clef at the end of bar 2
Symbols: The marimba symbol needs to go
Well that’s quite a list! I could go to each attribute and check off every item I want to delete.
But wait there is a quicker way…
Sometimes it’s all about what you don’t want
The list of what I want to keep is much shorter than what I want to get rid of. Wouldn’t it be much quicker if I could just designate the 2 items we want to keep?
Yes it would and here’s how to do it.
Select the bars to edit (passage selection, blue box)
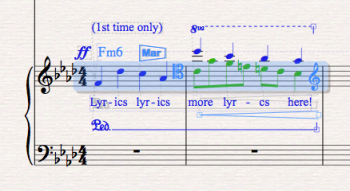
Open the advanced filter and instead of checking off what I want to delete I’m going to check what I want to keep. So it’s notes in voice one. Notice I’ve unchecked voices 2, 3, and 4. I’ve also unchecked everything in find except “Notes and Chords” and “Text.”
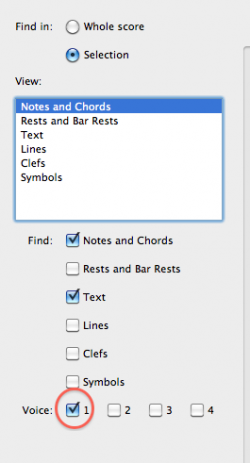
On the notes page, I’ve selected specific notehead type 0 which is the normal notehead.

In the text section it’s just lyrics.
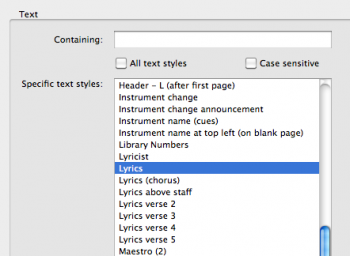
At this point I am going to use the often overlooked, under appreciated, neglected and lonely Deselect button which is down in the lower right corner of the window. Right there between Cancel and Select. I bet you never even noticed it before!

The Advanced filter has now deselected the notes in voice 1 with lyrics and everything else remains selected. Now click the delete key once.
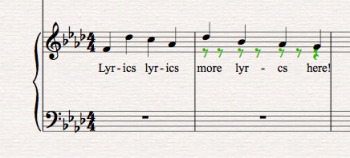
To get rid of those left over rests in voice 2, click delete once more and you have just the voice 1notes and lyrics left.
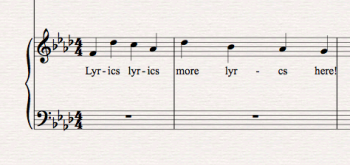
You’ll notice the spacing in the second bar is a bit askew. To tidy this up, select the bar and apply “Reset Note Spacing” which is under the tab Appearance in Sibelius 7 and the Layout menu in Sibelus 6.
This wraps the Advanced Filter tutorials for now. Take some time to explore the Advanced filter options see what repetitive or tedious tasks you may be able to cut to just a few steps.
Hinch
Leave a Reply