In my last blog post in this series Sibelius 7 Playback tips: Tweaking Gliss lines we looked at using the Inspector to tweak gliss lines. In this post we’ll use a very similar technique to fine tune the way ritard, accelerando and all other tempo based lines affect playback. For the rest of the post I will use ritard for the example but the same technique applies for accelerando and all other type of tempo lines.
Placement and Constraint
Before we tweak the playback of the ritard line, lets get it positioned correctly so it looks right and plays back the way we want it to.
First let’s look at the horizontal and vertical placement of the ritard line. Go to the Appearance tab and click on the design and position edit box.
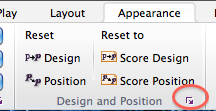
The Default positions window comes up. Here is where we can define the default horizontal and vertical position of text, lines and other objects.
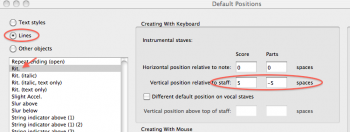
– Click on the Lines button
– Select Rit. which is the ritard text with a dashed line after it
– In the boxes for ‘Vertical position relative to staff:’ lets set it to 5 spaces for Score which is 5 spaces above the staff and -5 for Parts which is 5 spaces below the staff
– Click Ok
Next we want to make sure the ritard progresses over exactly 3 beats. The way to do this is constrain the ritard to a specific region. In the example below we want to ritard on beats 2 through 4 of bar 101. One thing to remember is that all tempo lines are system text. That means they will appear on the score and all the parts. So no matter what staff you use as a guide to place the ritard, it will appear where ever you have defined system objects to be. Which is usually at least above (or below) the top staff of the score. So when defining the region for the ritard you can use any staff in the score. So I’ll go to the the Horn 1 staff and use the 3 quarter notes as my guide to set up the region.
– Click on the quarter on beat 2 (it turns blue)
– Hold down shift and now click on the quarter note on beat 4. Now there is a blue passage selection around just those 3 beats

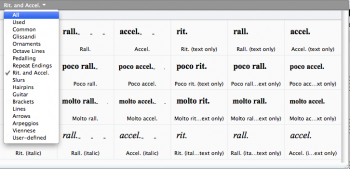
– Press the L key and the lines menu comes up, notice in the upper left corner is the word ‘All’ click on that and a menu drops down that allows you to narrow down your choice of lines. Select ‘Rit and Accel’ choose the box marked ‘Rit’ which is the word rit with a dashed line.
Now you have a ritard line placed exactly on 3 beats.
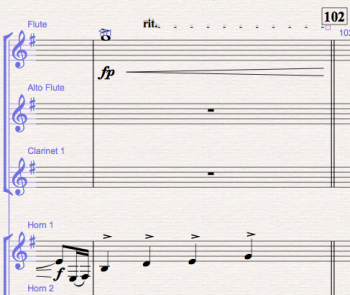
And notice in the parts the ritard line is below the staff.

Ritarding to and from specific tempos
When you add a ritard line the default playback behavior is a linear slowing of the tempo to 75% of the starting tempo. But what if you want to ritard from the starting tempo to a specific slower tempo?
It’s time to call in the Inspector! Let’s assume our starting tempo is quarter = 100 and we want to ritard to quarter = 84.
– First click on the ritard line and it turns purple
– Next you’ll need to open the Inspector panel. As you recall the Inspector can be found in the Home tab. You can also use the keystroke: option command P.
– Click on the % and change to bpm, to the left of that type in 84
– Click anywhere outside of the Inspector panel or click the ‘X’ in the upper right corner and it closes
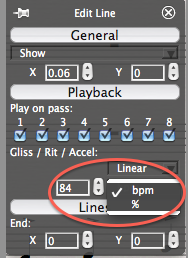
Now when you play the score it ritards evenly from 100 to 84. If you click on ‘Linear’ in the inspector, you’ll see you can further shape the ritard to be earlier or later.
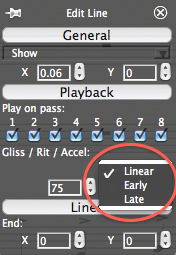
Experiment with these parameters and you can really dial in the ritard exactly the way you want it.
Check back for more playback tutorials.
Hinch
Great tutorial John! I’ve always just settled for the rit/accels that were default. Thanks
Very helpful, thank you very much
Thanks!